Showing posts with label Birthday parties. Show all posts

Tuesday, April 20, 2010

Making a Treasure box pinata #2

So...what started out as a great, cost effective, way to make a pinata for my sons birthday party...turned into HOURS upon HOURS of filthy, sticky, work...that was not only the labor of putting the thing together, but the mental, creative side that had to figure out how to put it together and make it look like the goal outcome...

I would say that when it was ALL done...I easily spent 20, spread out, hours on it. BUT, having said that...it turned out AWESOME and worked just like, if not better than, a store bought pinata.

So here, I removed the inner box...which I designed the whole thing around...this was hard, and I more-or-less had to rip and cut it out because the glue leaked through the cracks of the tin foil, but it didn't hurt the pinata...it is really strong.

Then I covered that open side with paper mache...and added 6 layers to it to make it as strong as all the other sides. Of course, letting each one dry before applying the next. You have to leave a hole in order to insert the candy. This will be covered later.


Here it is all dry...

I also made sure to remember where that hole was on the pinata...because in case it was too strong and the kids were unable to break it, I knew it would be a bit of a weak point...and a place we could easily help it break open.

So anyway, I filled it with the candy and duct taped STRONGLY the open hole.

**TIP**--I put the candy in goodie bags evenly distributed. One for each child. I didn't want anyone to be upset about not getting the same amount as anyone else. So when it broke open the bags flew out and everyone got to grab one. It worked out SOOOOOO well! These kids were all 5 and 6. The "hunt" of candy is good for older kids, I think, but the younger sets...they get too upset and frustrated, and not everyone moves at the same pace either. You could also put the actual goodie bags in the pinata, that would be kind of fun too.**

Then for the dome top...I just used posterboard, attached with duct tape.


Then I covered that with paper mache, but I only did 3 coats, as it doesn't hold any candy, and is only to finish the shape. Its structure doesn't need to be strong...plus I thought it would be funny, if the kids cracked it open and nothing came out... :)Hee Hee Hee

So, I contemplated painting it...I knew I could do that easily. I just knew there would be many bumps and imperfections that I couldn't cver.
I thought about using streamers like the pinatas at the store....but they don't make a gold or a brown streamer...
I thought about tissue paper, wrapped around the end of a pencil (totally old school) and then gluing it on (you know what I mean right??? but didn't know how I could make it look right...
so, anyway...this is what I came up with...

This is gold gift wrap tissue paper that I found at the Party Store. I cut it into strips, (thicker then I did the newspaper for macheing), and then frayed the ends.

At this time, I drilled holes to the sides in the lower, stronger part (where the candy has been added) and strung rope from one hole, through the middle, and out the other hole...in order to be hung securely from our deck...

At this point, I was kind of winging it. I didn't know how it was going to look. But, as I applied the tissue, the frayed ends, just automatically curled up...I couldn't believe it...

It took a while, but I did cover the whole thing...
I just put each row on with a little string of elmers glue.
It was messy...but easy!

And finally, it was time to put the details on...
I used streamers.
Oh...it was so good all done!!!
********
WAIT FOR IT
********
WAIT FOR IT
********
No really,
WAIT FOR IT!!!!!!
**********
*********
*******
******
*****
****
***
**
*

I was SO proud of how it came out!

I told Hubby that none of those kids better touch my pinata! :) But they did...and crushed it to shreds!

It was THE hit of the party for sure, and I was so happy with how it came out!
The MEMORIES made the time and mess and work SOOOOO worth it....
(This is Little having the first go at it.)
Would I do it again...???????
I already have next years planned out!

Raelyn

Sunday, April 18, 2010

Making a Treasure box pinata #1....

Last year, Middle's birthday party theme was PIRATES.
He wanted a pinata...

I, decided it would be "just as easy" to make a pinata from scratch.

Ummmm yeah......

So, for the brave, and those NOT afraid to make a big mess, (a big mess that has to stay around, day after day...while it dries, and needs another layer, and then dries again...etc...)

...here is the first step for a treasure box pinata....

a box...this is the foundation of the structure, which will be removed later.
cover all but ONE of the short sides in tin foil.
(the idea of the foil is to be able to pull the box out easily later...)

The glue mixture.... A LOT of it by the way.

...in the end I am betting to have gone through 14 school size bottles.... (they were the best deal at the time, or I would have gotten the big jug.
-------------------------------------------
Here are the first few layers.....
One side is left OPEN...This will be covered eventually, but it will be for candy insertion.

In the end, it will be the weakest side, so it will need some extra coats.

-------------------------------------------------
They say for a 6 year old...it need to be pretty strong, so, it needs about 6-7 coats.

IT IS EASY!!!! but VERY time consuming as you have to let EVERY layer dry before moving on to the next.
It is MESSY....and did I mention TIME CONSUMING....

More to come tomorrow...

Raelyn

Monday, March 29, 2010

Little Pink Ladybug....PARTY DAY!!!!

It was finally THE DAY!!!!!

Little was SOOOO excited! There is nothing like that FIRST birthday party with their friends.

Here are the very cute girls...{we also had three boys, but they were off playing Legos at the time of the picture. :)}


The kids played dress up....

And playdoh....
In between we did crafts, but I didn't really get pictures, because I was all hands-on. :)

This age is so funny...because they all play nicely, and do a little talking to each other...but primarily, they mirror play....They play the same thing next to each other...but they don't really play it together....
For me, it is just really cute to watch.
Little happens to be quite shy too, as are many at this age...
So it ended up being a lot like a big play-date.
They all had so much fun!

As predicted...they did meander into her bedroom too...

Here is the table....
*(this is actually the table after the party...but I never got a good before with all of the chaos......)
Ahhhh I love chaos!

The snacks were a big hit....
Especially the marshmallows!

We had strawberries and blueberries, and pink marshmallows, (Valentine)colored M&Ms, Muligrain chips (because they have flax seed spots), strawberry milk, and pink dipped pretzels which there is no picture of here...

The kids were so excited and ready for some CAKE.and.ICE.CREAM!


SO, I AM GOING TO LET YOU IN ON MY FAVORITE BIRTHDAY TRICK!!!!!!!
We scoop out the ice cream before the party, and put them in individual cupcake liners, in muffin tins, and freeze them.
Then after they are re-hardened...you can either leave them in the muffin tin, or you can put them in a rubbermaid or even a ziplock bag...
Either way...all you have to do is grab and give to each child, rather then scoop...make them wait...and make a mess!
LOVE.IT! SO.SO.EASY!


Here are the cupcakes...
Next to the birthday girl...they were the STAR of the party! :)
They turned out SO cute.

Boxed cake mix...Cherry Chip.
I made pink frosting and chocolate frosting.
So simple to decorate...

On the top cupcake...just for some character, I unwrapped the cupcake and frosted the whole thing like a little cake...then I decorated it fully, rather then just the top.


The whole day was great...
Because of the number of kids, it was just super calm, and there was lots of room...and everyone got along.
It was a really great day.
Little had a wonderful time....and after all...
That is the reason I ultimately put in all of the time that I put in....
To make my Little happy!

Raelyn

Saturday, March 27, 2010

Birthday party decorations....

I started out by making a whole bunch of 12" circle ladybugs out of scrapbooking paper. I used some plain pink in a couple different shades...and then some with patterned paper which I liked best.
The heads are 5" and the spots are 2"
Pipe cleaner antenna finished them off.
I think I made 10 of these.


Lots of black and pink streamers...hung all over the place!


This is our entry way....
There were streamers, and lots of randomly placed ladybugs.
I also made "half-ladybugs"...They were put on the headers above the stairs to look as though they too were going down.


Same thing, as above...just cut the pink 12" circles in half, and didn't add a head.
They were so cute!
Lots of comments from the mommies at the party!


Finally, there were more "half-ladybugs" that were crawling up the stairs, and around the dining room, where the kids had food and cake.
Again, done the same as the big ladybugs, just cut in half...head cut in half, and antenna added!

They just added so much to the party.
There were even a few in Little's bedroom, because I knew eventually the kiddos would meander up to see what was in her room!

Table
The table looked amazing.
I never got a good picture of the table before the kids were at it...because I couldn't decorate it too long before people began arriving...obviously...
The placemats, cups, small plates and napkins came from birthday express...
I made the centerpiece, as seen in THIS post...
I bought the buckets in the dollar section of Target...and that is also where I ended up getting the large square plates, and the cutlery.

The placemats were really cute, and well made, and the back has all kind of activities for the kids to do while they are waiting, or after they are done.


I made these little ladybugs and hung them from the chandelier...
They are actual mini versions of what were placed all over the walls...but then I realized they were going to spin, and that the other side would look plain and ugly...so I put the cute little ladybug printed from the tags on the goodie boxes, on the other side so both sides had some interest.

They turned out darling!
One of my favorite parts....especially once I put the ladybug cupcakes underneath it!

The goodie bags again...


Party Crafts...
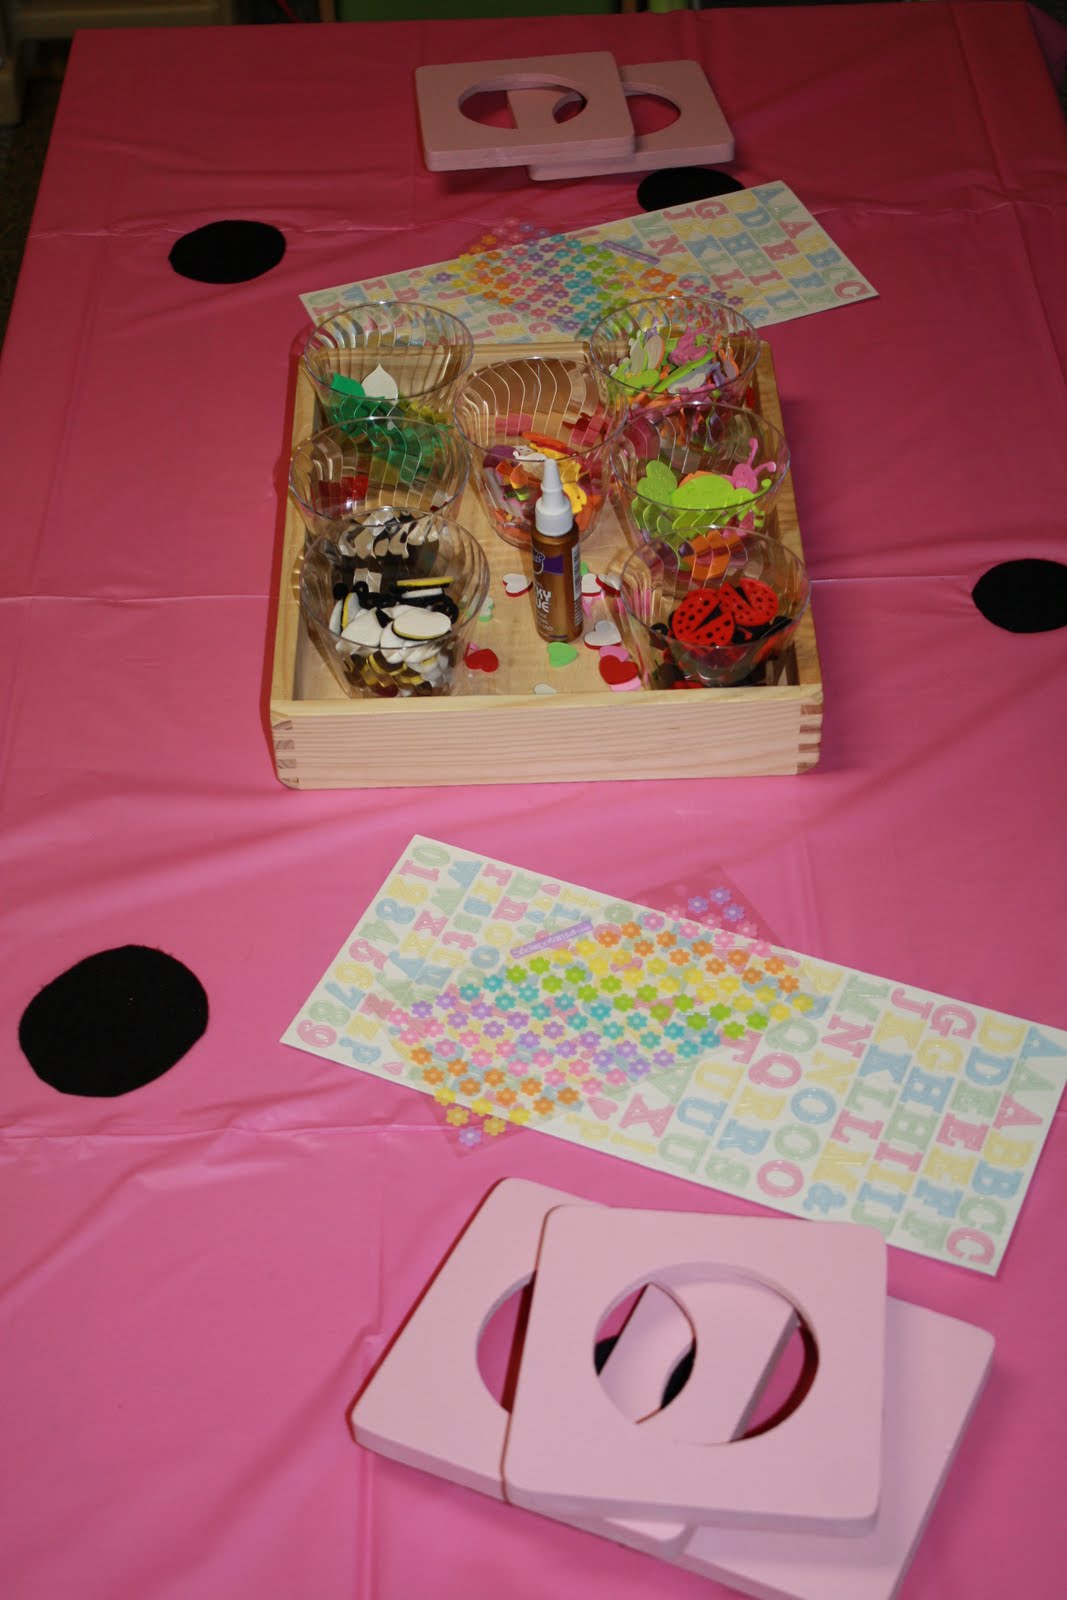
The first craft that we did, was to decorate picture frames.
I found them at the dollar store, marked 2/$1.00. They are real wood, and have REAL glass in them! I was so impressed.
I came home and spray painted them all pink.
If the girls were older, I would have let them paint them...but at this age, stickers are better....
I had all kinds of foam sticker pieces that they could choose from, as well as sticker letters, and flowers.
The plan is to give the frames to them, with their thank you cards, and one of the pictures I took in it.

********************************************
Our second craft was to make pony bead necklaces.
I used yarn, and PREput on child friendly big plastic needles (found in the child craft section of Joanns) I taped them in place with a tiny piece of masking tape so that the kids didn't accidentally remove the needle.
I also tied a white bead to the end of each of them, so that the beads didn't just come straight off the other side.
We had two different pinks, black, and white beads...as well as hearts and letters.
The kids loved being able to make and wear their creations, and to take them home!
{Sorry, I couldn't get my picture to flip}

**************************************
We had a playdoh station, which ended up being SUPER popular.
Had I known, I would have just made it a big huge playdoh party. It needed to be a much bigger table.


Happy Birthday Banner
This was my very favorite part of the decorations...
So much so...I can't seem to take it down.
Around one of the doorways in the playroom (where the party was held) I made a Happy Birthday banner.

I printed out wallet size black and white pictures of Little...from birth to now. On each picture I put one letter in pink...spelling out Happy 4th birthday Little.


I backed them all pink and black, with a little sage green mixed in as well.

My plan was to string them...but I just plain ran out of time...so I improvised.


Here are a couple of close-ups.


Will post the actual party tomorrow!
Raelyn