Wednesday, March 31, 2010

Crock Pot Chicken Tortilla Soup

I LOVE.love.LOVE to cook.
In my adult life I have grown into quite a competant home cook {if I do say so myself}...I LOVE to play in the kitchen.
I almost never COPY recipes...I lOVE to change them and make them my own...and most of the time they are off the chart Y-U-M-M-Y! I have also created many of my own...
I do happen to have a wonderful family who love to take on my constant trial and error, and that helps make me a better cook.
ANYWAY.....
Tonights dinner was just YUM...and Oh so easy!
I love me a good crockpot meal...especially on soccer nights! :)
This recipe originally came from an OLD Betty Crocker cookbook...but I altered it...many times...and have adapted it to fit a crockpot.
So here it is...


3 cups cooked chicken (we happen to love it shredded)
4 cups chicken broth
2-3 cloves of garlic
1 can light kidney beans
2 cans diced tomatoes, undrained and blended (I use a stick blender, right in the can)
1 cup of your favorite salsa (I would do less if super spicy)
1 1/2 cup frozen corn
1/2-3/4 cup fresh shredded cilantro
1 1/2 TBS ground cumin

Put everything in the crockpot together. Cover and cook on low for 8 hours...if you MUST do high...you can but it really needs at least 3 1/2 hours to come together.

TOPPINGS:
Cheese (any)
Avacado
Cilantro
Tomato
Tortilla Chips
Sour Cream

Ladle into bowl and top with all of your favorites.


*I have also added jarred sliced jalenpeno...very good...BUT remember jarred jalepenos are MUCH spicier then fresh. I only use one, or two slices...two will give it quite a kick...one just gives a hint of spice.
I know many people who love rice in their torilla soup as well, and this would be easy to do...but I would cook it first...don't put it in raw, or it will soak up a lot of the liquid.

It's really great with quesadillas.

Looks good huh?????
YUMMMMMMY

Raelyn

Tuesday, March 30, 2010

A hallway wall...

So, we live in a fairly standard split level house.
Though we have spent YEARS, literally, fixing...changing...remodeling...making it our own...it still is, will forever be...and standard split level layout.

When you come up our stairs there is a long narrow hallway.
It is one of my least favorite areas of our home. There isn't a lot that can be done, because it is, in fact, narrow.

It needed warmth...and a touch of home....
I decided to finally do a picture wall. I big huge wall of collaged pictures!
The wall looked like this....
The color is called Coconut Milk...but with nothing on the walls, it may as well be white...RIGHT?

This was my inspiration.
I DO NOT often buy things that are not clearanced, or goodwill, or garage sale...but I just loved this sign. It spoke to me.
So...I waited until it was on sale, and I bought it.
Then I centered it...and started working around it.

I thought I would just use what I already had...frame-wise. I would go for that eclectic look. I tried to make it sort of even...on each side, so that my sign stayed the focal point.

I hung each one...trying to be semi-semetrical...even though my frames were not.

Done.
I have tried to love it.
The hubby has tried to love it.
I DO love that it is done...and that there is some love on the hallway walls...
BUT
I just don't love it.
I LOVE symmetry.
I need same sized frames, and same color frames...

Eventually...
I will repaint some of my frames, and buy some new frames...
And redo my hallway wall.
But for now...
I am at least loving that it is...
DONE!

Raelyn

Monday, March 29, 2010

Little Pink Ladybug....PARTY DAY!!!!

It was finally THE DAY!!!!!

Little was SOOOO excited! There is nothing like that FIRST birthday party with their friends.

Here are the very cute girls...{we also had three boys, but they were off playing Legos at the time of the picture. :)}


The kids played dress up....

And playdoh....
In between we did crafts, but I didn't really get pictures, because I was all hands-on. :)

This age is so funny...because they all play nicely, and do a little talking to each other...but primarily, they mirror play....They play the same thing next to each other...but they don't really play it together....
For me, it is just really cute to watch.
Little happens to be quite shy too, as are many at this age...
So it ended up being a lot like a big play-date.
They all had so much fun!

As predicted...they did meander into her bedroom too...

Here is the table....
*(this is actually the table after the party...but I never got a good before with all of the chaos......)
Ahhhh I love chaos!

The snacks were a big hit....
Especially the marshmallows!

We had strawberries and blueberries, and pink marshmallows, (Valentine)colored M&Ms, Muligrain chips (because they have flax seed spots), strawberry milk, and pink dipped pretzels which there is no picture of here...

The kids were so excited and ready for some CAKE.and.ICE.CREAM!


SO, I AM GOING TO LET YOU IN ON MY FAVORITE BIRTHDAY TRICK!!!!!!!
We scoop out the ice cream before the party, and put them in individual cupcake liners, in muffin tins, and freeze them.
Then after they are re-hardened...you can either leave them in the muffin tin, or you can put them in a rubbermaid or even a ziplock bag...
Either way...all you have to do is grab and give to each child, rather then scoop...make them wait...and make a mess!
LOVE.IT! SO.SO.EASY!


Here are the cupcakes...
Next to the birthday girl...they were the STAR of the party! :)
They turned out SO cute.

Boxed cake mix...Cherry Chip.
I made pink frosting and chocolate frosting.
So simple to decorate...

On the top cupcake...just for some character, I unwrapped the cupcake and frosted the whole thing like a little cake...then I decorated it fully, rather then just the top.


The whole day was great...
Because of the number of kids, it was just super calm, and there was lots of room...and everyone got along.
It was a really great day.
Little had a wonderful time....and after all...
That is the reason I ultimately put in all of the time that I put in....
To make my Little happy!

Raelyn

Saturday, March 27, 2010

Birthday party decorations....

I started out by making a whole bunch of 12" circle ladybugs out of scrapbooking paper. I used some plain pink in a couple different shades...and then some with patterned paper which I liked best.
The heads are 5" and the spots are 2"
Pipe cleaner antenna finished them off.
I think I made 10 of these.


Lots of black and pink streamers...hung all over the place!


This is our entry way....
There were streamers, and lots of randomly placed ladybugs.
I also made "half-ladybugs"...They were put on the headers above the stairs to look as though they too were going down.


Same thing, as above...just cut the pink 12" circles in half, and didn't add a head.
They were so cute!
Lots of comments from the mommies at the party!


Finally, there were more "half-ladybugs" that were crawling up the stairs, and around the dining room, where the kids had food and cake.
Again, done the same as the big ladybugs, just cut in half...head cut in half, and antenna added!

They just added so much to the party.
There were even a few in Little's bedroom, because I knew eventually the kiddos would meander up to see what was in her room!

Table
The table looked amazing.
I never got a good picture of the table before the kids were at it...because I couldn't decorate it too long before people began arriving...obviously...
The placemats, cups, small plates and napkins came from birthday express...
I made the centerpiece, as seen in THIS post...
I bought the buckets in the dollar section of Target...and that is also where I ended up getting the large square plates, and the cutlery.

The placemats were really cute, and well made, and the back has all kind of activities for the kids to do while they are waiting, or after they are done.


I made these little ladybugs and hung them from the chandelier...
They are actual mini versions of what were placed all over the walls...but then I realized they were going to spin, and that the other side would look plain and ugly...so I put the cute little ladybug printed from the tags on the goodie boxes, on the other side so both sides had some interest.

They turned out darling!
One of my favorite parts....especially once I put the ladybug cupcakes underneath it!

The goodie bags again...


Party Crafts...
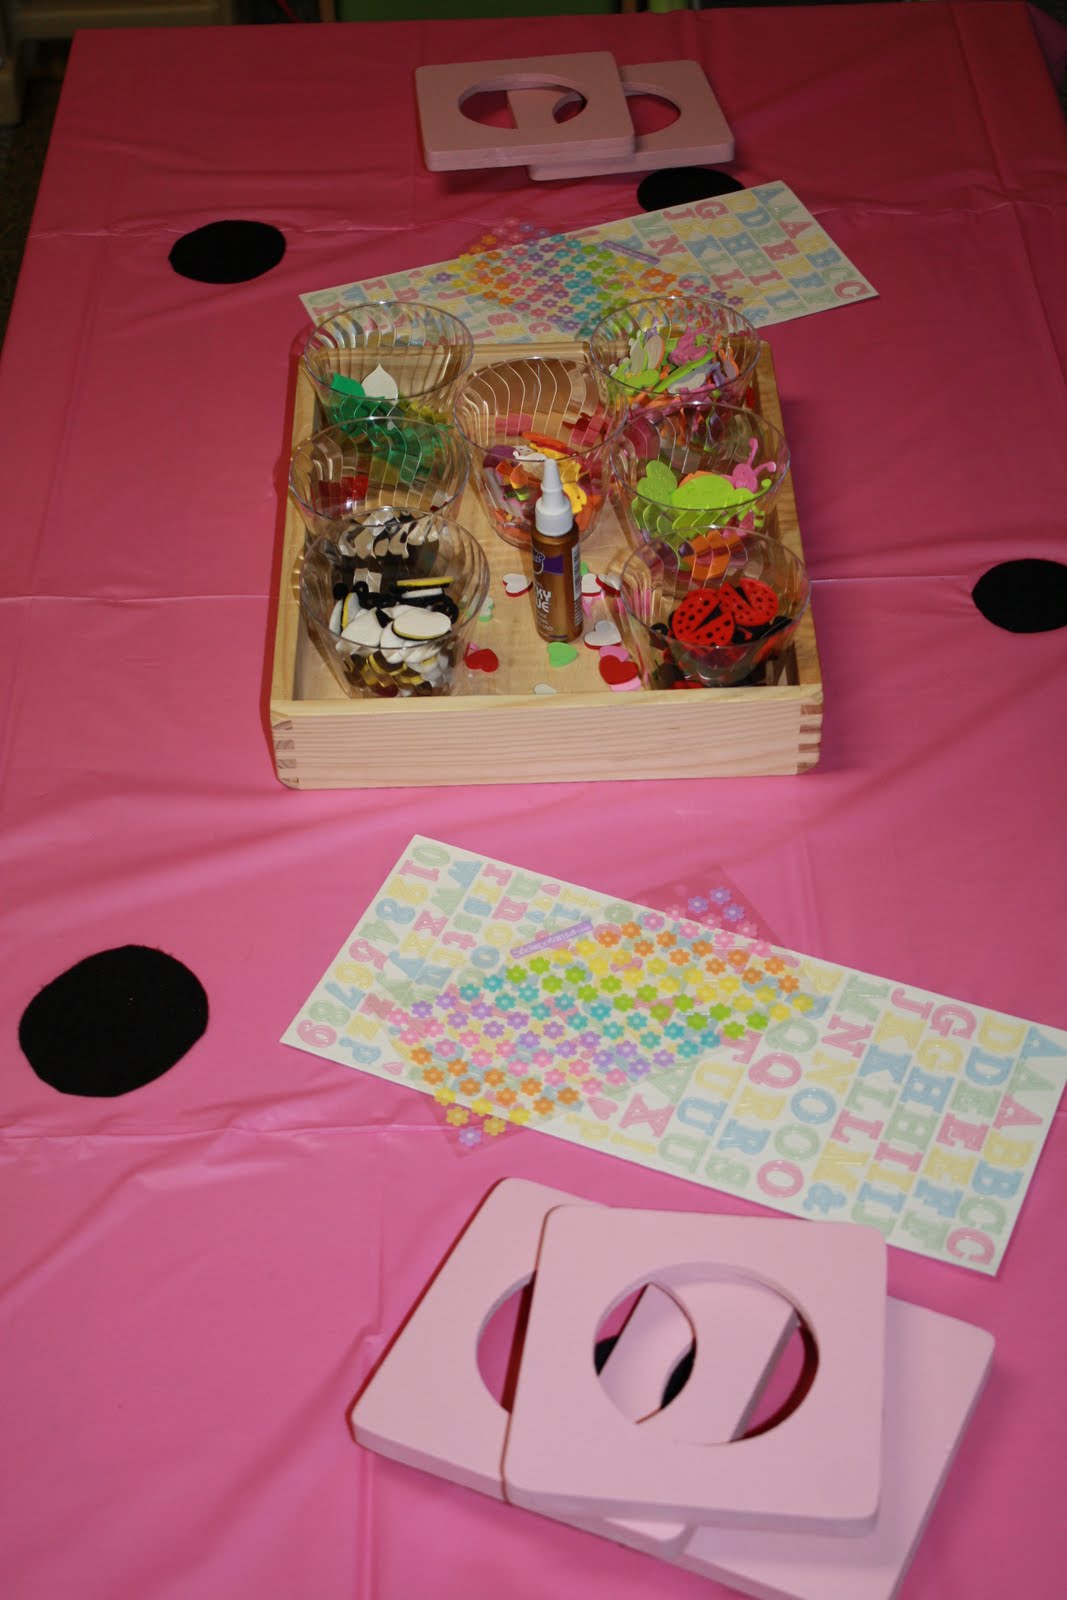
The first craft that we did, was to decorate picture frames.
I found them at the dollar store, marked 2/$1.00. They are real wood, and have REAL glass in them! I was so impressed.
I came home and spray painted them all pink.
If the girls were older, I would have let them paint them...but at this age, stickers are better....
I had all kinds of foam sticker pieces that they could choose from, as well as sticker letters, and flowers.
The plan is to give the frames to them, with their thank you cards, and one of the pictures I took in it.

********************************************
Our second craft was to make pony bead necklaces.
I used yarn, and PREput on child friendly big plastic needles (found in the child craft section of Joanns) I taped them in place with a tiny piece of masking tape so that the kids didn't accidentally remove the needle.
I also tied a white bead to the end of each of them, so that the beads didn't just come straight off the other side.
We had two different pinks, black, and white beads...as well as hearts and letters.
The kids loved being able to make and wear their creations, and to take them home!
{Sorry, I couldn't get my picture to flip}

**************************************
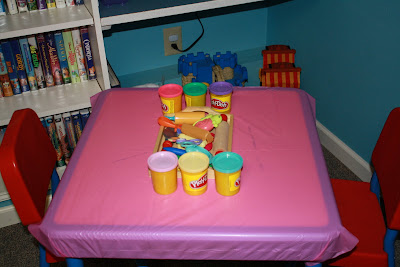
We had a playdoh station, which ended up being SUPER popular.
Had I known, I would have just made it a big huge playdoh party. It needed to be a much bigger table.


Happy Birthday Banner
This was my very favorite part of the decorations...
So much so...I can't seem to take it down.
Around one of the doorways in the playroom (where the party was held) I made a Happy Birthday banner.

I printed out wallet size black and white pictures of Little...from birth to now. On each picture I put one letter in pink...spelling out Happy 4th birthday Little.


I backed them all pink and black, with a little sage green mixed in as well.

My plan was to string them...but I just plain ran out of time...so I improvised.


Here are a couple of close-ups.


Will post the actual party tomorrow!
Raelyn

Friday, March 26, 2010

Ladybug party goodie boxes

Time for the goodie bags...or in this case...boxes.
I didn't purchase too many things that were "pre-made". Most all of the decorations and projects etc...were made from scratch. However, the few things that I did find were online at Birthdayexpress.com. That was the only place that had anything with pink ladybugs. Their prices are great, their shipping was fast...and it turns out, that this particular line of decorations, were made *{super local}* in Kirkland Washington! (which just makes me happy)
One thing that I fell in LOVE with on the site were the goodie boxes!
They were great quality, and OH SO cute!

So, here is the box all put together...

And filled with childhood happiness...
Little has, in my opinion, a GREAT birthday slot...right after Valentine's and right before Easter! Perfect for goodie bag fillers for a little girl!

These are the little tags that I made...

a little love on the back....

Aren't they just all together CUTE! Love.Them!

I adored the way they looked all lined up there.
There are two that have no tags...that were extras, as two girls didn't come...so they became the non-RSVP boxes...(just in case) and then the red bags were different, for the two older boys that were included (one being big brother.)

All coming together...only two days to go!

Raelyn

Bithday Centerpiece for a Girl or Boy

Have you seen the pure bliss that IS HowDoesShe?.
Their blog is fabulous...here is the link in case you have lived in a bubble and have never checked it out...
www.howdoesshe.com

I know everyone else drools over this site like I do. They are A-MAZING! I.Love.Them.
I also happen to LOVE me a 2X4...and so do they! So, I adore when they come up with new, fun things to do with one. Like this....

With Little's birthday coming, and Middle's only a few short months away, I thought...Let's give it a go!
And I think it turned out FABULOUS!

They have a wonderful tutorial...and wonderful ideas to do with it...like putting in special favors to do for the birthday child for a week before the big day!
I LOVED the idea of it!
I could just see the kids and mom and dad, putting a special favor or treat in each of the clips. Then when one days favor is pulled out, replacing it with a picture...
I.LOVE.THAT!

Anyway....so I started by finding a scrap piece of 2X4 that the hubby had in the garage...
it was smaller then the one they used at HowDoesShe?, so I improvised...

I Mod Podged (if you search, they even have a tutorial on how to use Mod Podge in case you have never seen its glory!!!) girly scrapbook paper to one of the long sides...

And boyish scrapbook paper to the other long side...

This of course makes it a two-fer....and who doesn't love a two-fer???

I had to double up my scrapbook paper, as the paper is 12X12...but the board was 18 inches...so there was a seam. No worries, the letters cover this up later!

I sanded and distressed all of the edges with watered down, walnut colored, stain.

I actually ended up using scrapbooking letter stickers, instead of vinyl. I have a cricut and could have done vinyl, but these were the perfect size and I like the way they look...A LOT!


When I was done, I semi-mixed cream and eggplant paint to make a swirly kind of brown, and painted the top...where I will later drill holes. I did this because it was kind of an old, beat up, sad looking 2X4!

Do another layer of Mod Podge in order to seal it, and give it a nice gloss (mine happens to be glossy Mod Podge)

I made my own picture holders because my husband has a TON of these skinny flimsy wires (don't know what they were ever for...) so I took two, and twisted them together. Then I used needlenose pliers and created the swirl at the top.
Use a drill bit that matches the width of your wires, and drill about halfway into the 2X4.
Put the wires in. Mine fit 6 across...


Finally I attached an alligator clip where HowDoesShe? put her scrapbooking clip, because, hard as I tried, I couldn't find any! I love that this part lends itself to being a never ending centerpiece...as you can change the age!

I really do LOVE the way it came out!

Thank you to HowDoesShe? for always having such beautiful ideas!
You inspire me daily!

Raelyn